AWS VPS Setup
Learn how to get an "EC2" VPS setup with Amazon Web Services (AWS), starting at just a few dollars a month, or free for your first year with Free Credit. If you're looking for an always free solution, head back to the Environment Setup page to explore other options!
Amazon Web Services, Inc. is a subsidiary of Amazon that provides on-demand cloud computing platforms and APIs to individuals, companies, and governments, on a metered, pay-as-you-go basis. Oftentimes, clients will use this in combination with autoscaling. – Wikipedia
If you need help at any point with setting up Qbot, please don't hesitate to join our Discord server!
Confirm your region is supported
Due to Roblox requirements for cookies to be obtained in the same IP region as they are used, you can only use AWS for hosting your bot if you share an IP region with that of one of their datacenters, which can be found on their website below:
The five main IP regions:
- AfriNIC - African region
- APNIC - Asia Pacific region
- ARIN - North America and several Caribbean and North Atlantic islands
- LACNIC - Latin America and the Caribbean
- RIPE NCC - Europe, the Middle East, and parts of Central Asia
Register with AWS
You can sign up with AWS on their website to take advantage of their free offers:
https://portal.aws.amazon.com/gp/aws/developer/registration/index.html
Setup may involve adding a payment method to be on file or adding balance to your account.
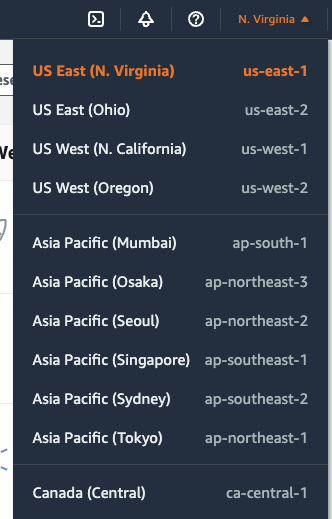
Select your rgeion
Once logged in, at the top right of the AWS Management Console, you should select the region closest to you for your resources to belong to.
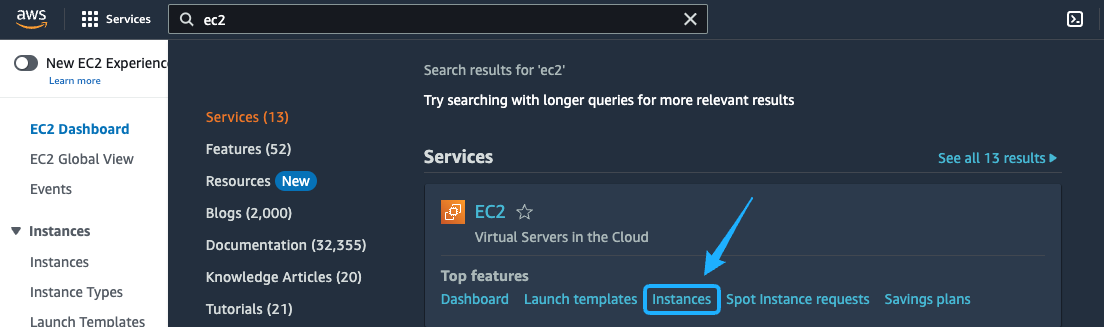
Create an EC2
- Search for EC2, and underneath, select Instances (you may have to hover for this to appear).
- At the top right, click the orange Launch Instances button.
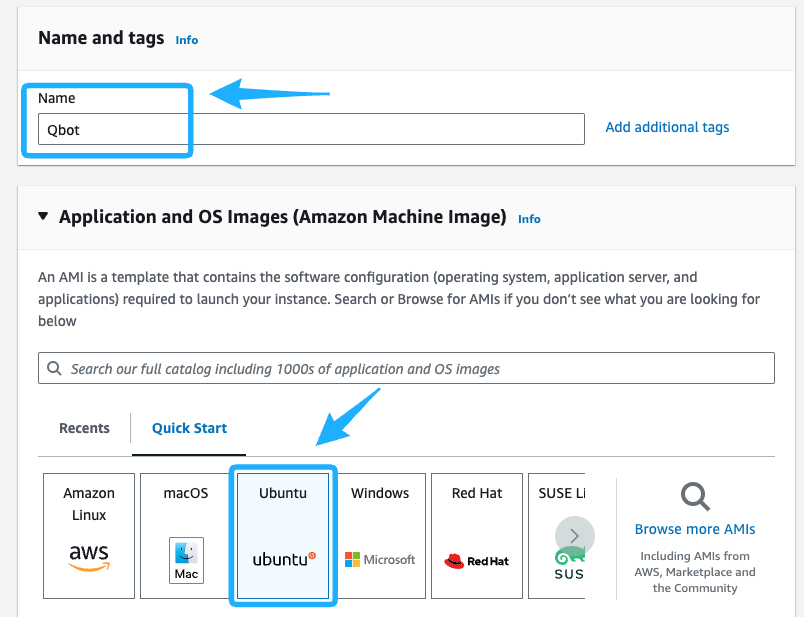
- Give your EC2 a unique name and select Ubuntu as the operating system.
- Scroll down to Instance Type and select
t2.micro, or whichever tier is marked as Free Tier Eligible in your region.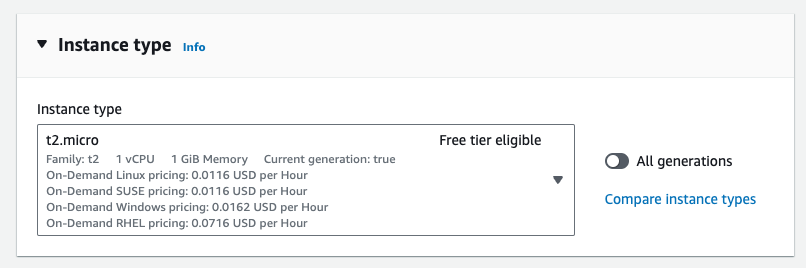
- Under the Key Pair option, create a new key pair.
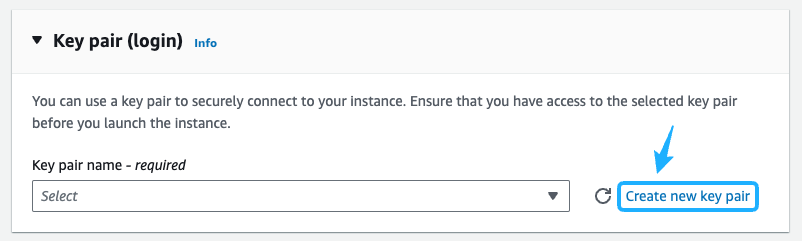
- Give it a unique name and click Create Key Pair.
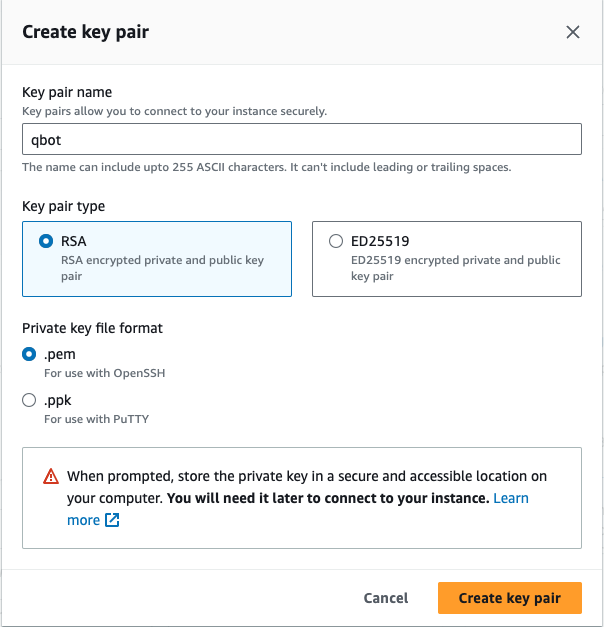
- Important: Move the downloaded
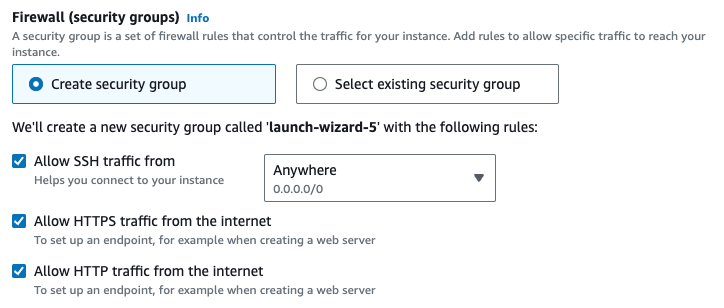
.pemfile to a secure place on your computer where you will be able to find it later. This grants access to the VPS, so be careful with not sharing it. - Under Firewall in Network Settings, enable HTTP and HTTPS traffic.
- On the bottom right of the page, click the orange Launch Instance button.
- You can optionally create a billing limit under Next Steps so you aware of any charges that occur from incorrect configurations.
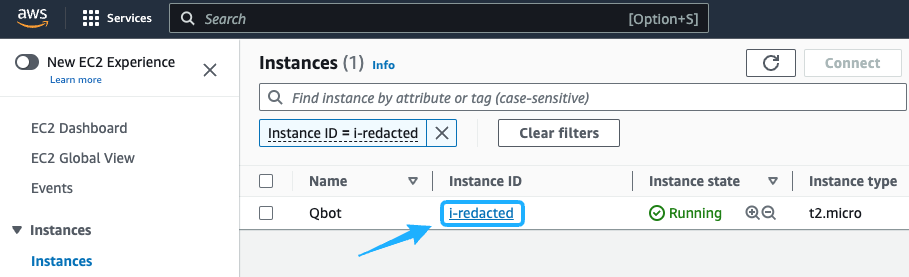
- Click the link that starts with
i-to search for your EC2's configuration page.
- Wait a few minutes for your EC2 to initialize.
The AWS Free Tier gives 750 hours of an EC2 instance for your first 12 months as a customer. You may be charged after that trial period; you are encouraged to research how much because it varies by instance type and region.
Login to your EC2
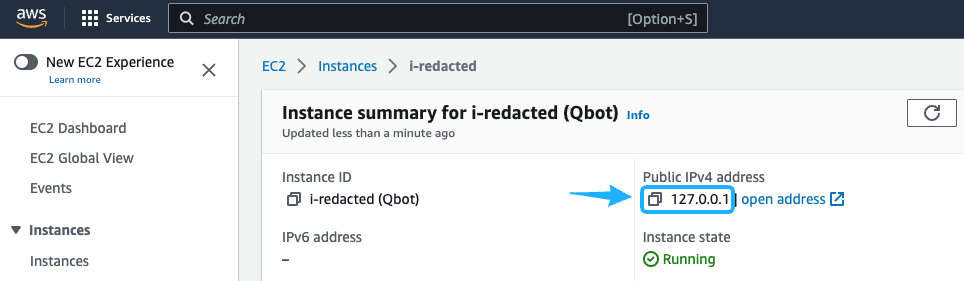
- In the table of filtered instances, select the link under Instance ID for your new Qbot EC2.
- Copy the Public IPv4 Address to your clipboard.
- Open the terminal on your computer. On Mac, you can do this by searching for the Terminal application. On Windows, press Windows + R and enter
cmd. - Find the absolute path of the
.pemfile you saved earlier. On Mac, find it in Finder, select View at the top, enable Show Path Bar, right click the file name at the bottom of Finder and click Copy [...] as Pathname. On Windows, find it in File Explorer, right click and then open Properties, and copy the file path next to Location. - If you're on Mac or Linux/Ubuntu, run
chmod 400 [pempath], where [pempath] is the absolute path to your .pem file. This restricts permissions to the file. - Run the command
ssh -i [pempath] ubuntu@[server ip], where [pempath] is the absolute path to your .pem file, and [server ip] is the Public IPv4 Address of your EC2. - Type
yesand press enter if prompted about the authenticity of the host.
Continue with Next Steps
Continue on under Next Steps with the Environment Setup guide to get Qbot ready to install onto your new VPS!