Oracle VPS Setup
Learn how to get a VPS setup with Oracle Cloud for free, forever, thanks to the Always Free plans provided by Oracle.
Oracle Cloud is a cloud computing service offered by Oracle Corporation providing servers, storage, network, applications and services through a global network of Oracle Corporation managed data centers. The company allows these services to be provisioned on demand over the Internet. – Wikipedia
If you need help at any point with setting up Qbot, please don't hesitate to join our Discord server!
Confirm your region is supported
Due to Roblox requirements for cookies to be obtained in the same IP region as they are used, you can only use DigitalOcean for hosting your bot if you share an IP region with that of one of their datacenters, which can be found on their website below:
The five main IP regions:
- AfriNIC - African region
- APNIC - Asia Pacific region
- ARIN - North America and several Caribbean and North Atlantic islands
- LACNIC - Latin America and the Caribbean
- RIPE NCC - Europe, the Middle East, and parts of Central Asia
Register with Oracle
You can sign up with Oracle Cloud on their website to take advantage of their free offers:
https://signup.cloud.oracle.com
Setup may involve adding a payment method to be on file or adding balance to your account. While signing up, set your home region as the one closest to you, as it must be in the same IP region.
Create a Compute Instance
- Go to the Create Cloud Compute page..
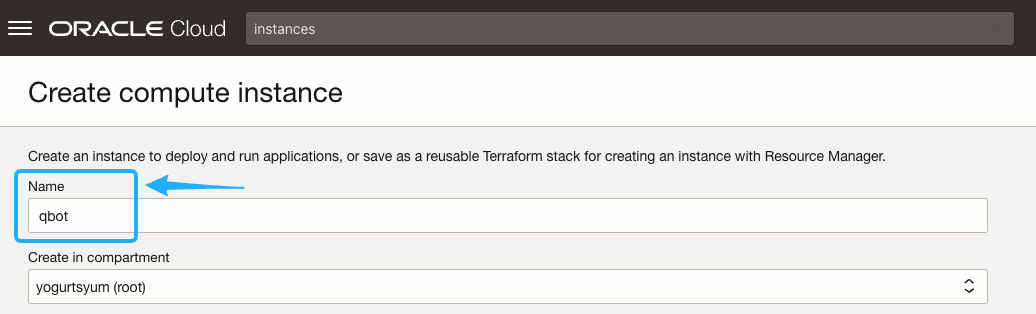
- Give it a unique name. Leave the default compartment setting.
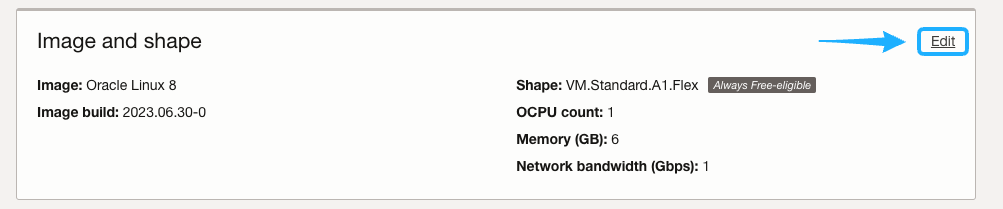
- Choose Edit under Image and Shape.
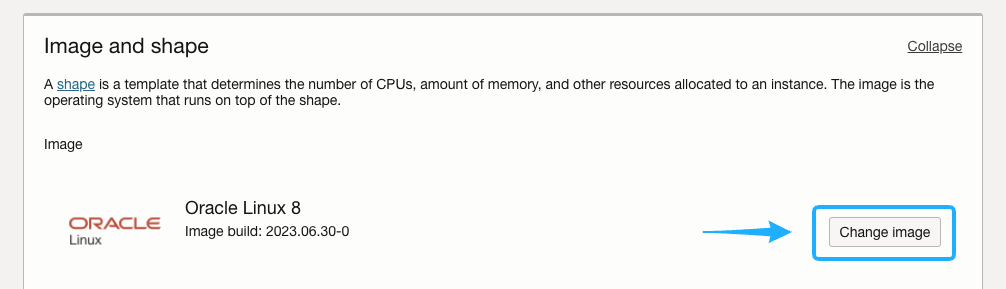
- Click Change Image.
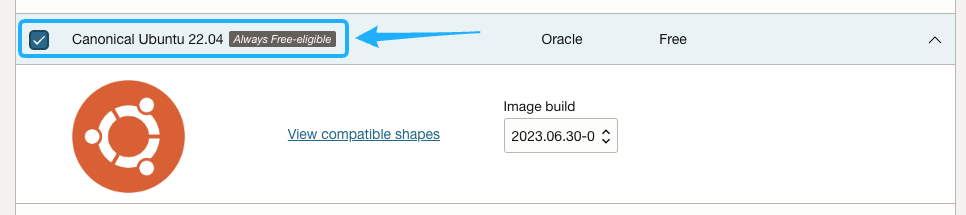
- Go to the Ubuntu category.
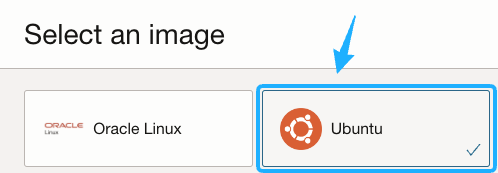
- Select Canonical Ubuntu 22.04.
- Under Networking, select the option to create a new virtual cloud network.

- Ensure the image, shape, and availability domain are all Always Free-Eligible. If they aren't, choose a free alternative, unless you are hoping to pay for these resources.
- Download a new Oracle-generated SSH key for this Qbot instance by selecting Save Private Key.
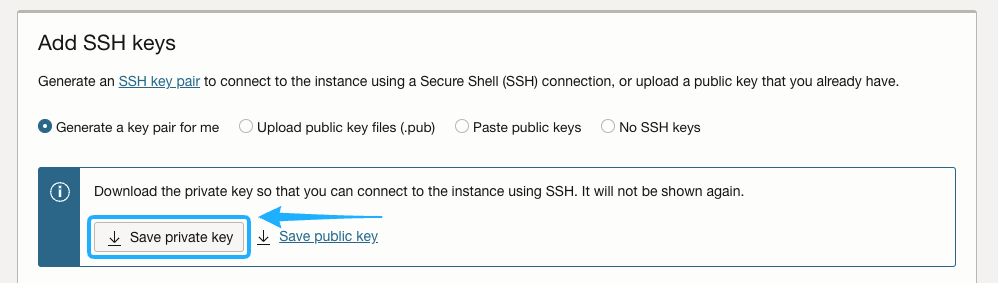
- Important: Move the downloaded
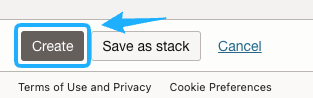
.keyfile to a secure place on your computer where you will be able to find it later. This grants access to the VPS, so be careful with not sharing it. - Finalize the VPS creation using the Create button at the bottom left of the page. You may need to press this button twice if nothing happens the first time. If you get an error about lack of availability in your domain, you may need to change the VPS shape and availability domain until there is available free-tier eligible compute.
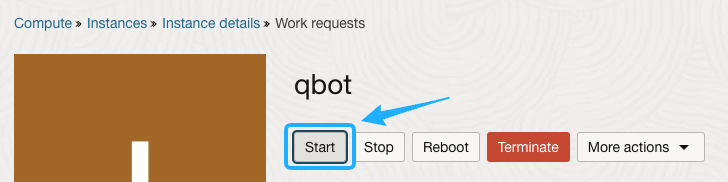
- Start the VPS by clicking Start. Wait for this to complete, which will be indicated by RUNNING being shown under the instance icon.
Login to the VPS
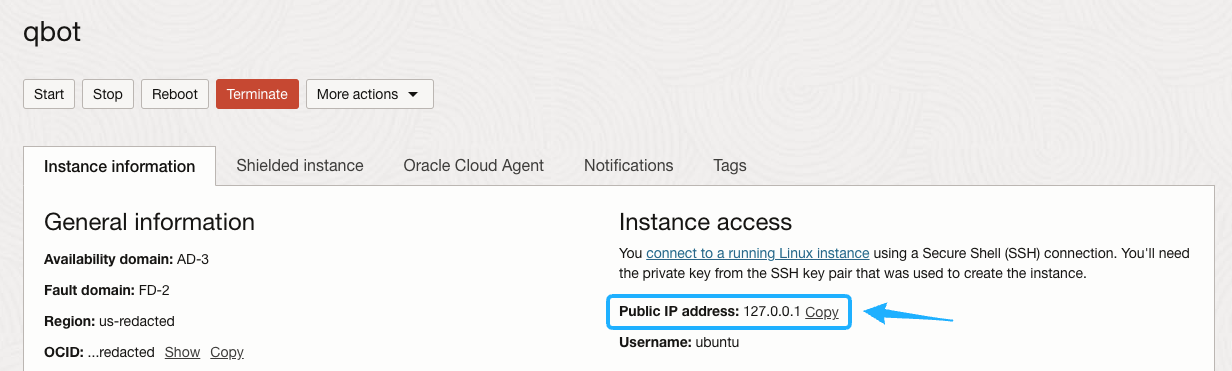
- Under Instance Access, copy the Public IP Address.
- Open the terminal on your computer. On Mac, you can do this by searching for the Terminal application. On Windows, press Windows + R and enter
cmd. - Find the absolute path of the
.keyfile you saved earlier. On Mac, find it in Finder, select View at the top, enable Show Path Bar, right click the file name at the bottom of Finder and click Copy [...] as Pathname. On Windows, find it in File Explorer, right click and then open Properties, and copy the file path next to Location. - If you're on Mac or Linux/Ubuntu, run
chmod 400 [keypath], where [keypath] is the absolute path to your .key file. This restricts permissions to the file. - Run the command
ssh -i [keypath] ubuntu@[server ip], where [keypath] is the absolute path to your .key file, and [server ip] is the Public IPv4 Address of your EC2. - Type
yesand press enter if prompted about the authenticity of the host.
It is normal for it to look like you are not typing anything when entering a password in your terminal.
Continue with Next Steps
Continue on under Next Steps with the Environment Setup guide to get Qbot ready to install onto your new VPS!